

Solar panels are becoming an increasingly popular way for homeowners to save money on their energy bills and reduce their carbon footprint. By harnessing the power of the sun, solar panels can provide clean and renewable energy to power your home. In this step-by-step guide, we will walk you through the process of installing solar panels on your home.
Step 1: Determine Your Energy Needs
The first step in installing solar panels at home is to determine how much energy your household consumes on a daily basis. This will help you calculate the size of the solar panel system you will need to meet your energy needs. You can use an online calculator or consult with a professional to get an accurate estimate of your energy usage.
Step 2: Choose the Right Solar Panel System
There are several types of solar panel systems available, including grid-tied, off-grid, and hybrid systems. The type of system you choose will depend on your energy needs, budget, and location. It’s important to research different manufacturers and installers to find the best system for your home.
Step 3: Obtain Permits and Approval
Before installing solar panels on your home, you will need to obtain the necessary permits and approvals from your local government. This may include zoning permits, electrical permits, and approval from your homeowners’ association. Be sure to check with your local authorities to ensure you are following all regulations and guidelines.
Step 4: Install the Mounting System
The next step in the installation process is to install the mounting system for your solar panels. This will involve attaching the mounting brackets to the roof of your home and securing them in place. It’s important to ensure that the mounting system is secure and able to support the weight of the solar panels.
Step 5: Install the Solar Panels
Once the mounting system is in place, it’s time to install the solar panels. This will involve connecting the panels to the mounting brackets and securing them in place. It’s important to follow the manufacturer’s instructions carefully to ensure the panels are installed correctly and securely.
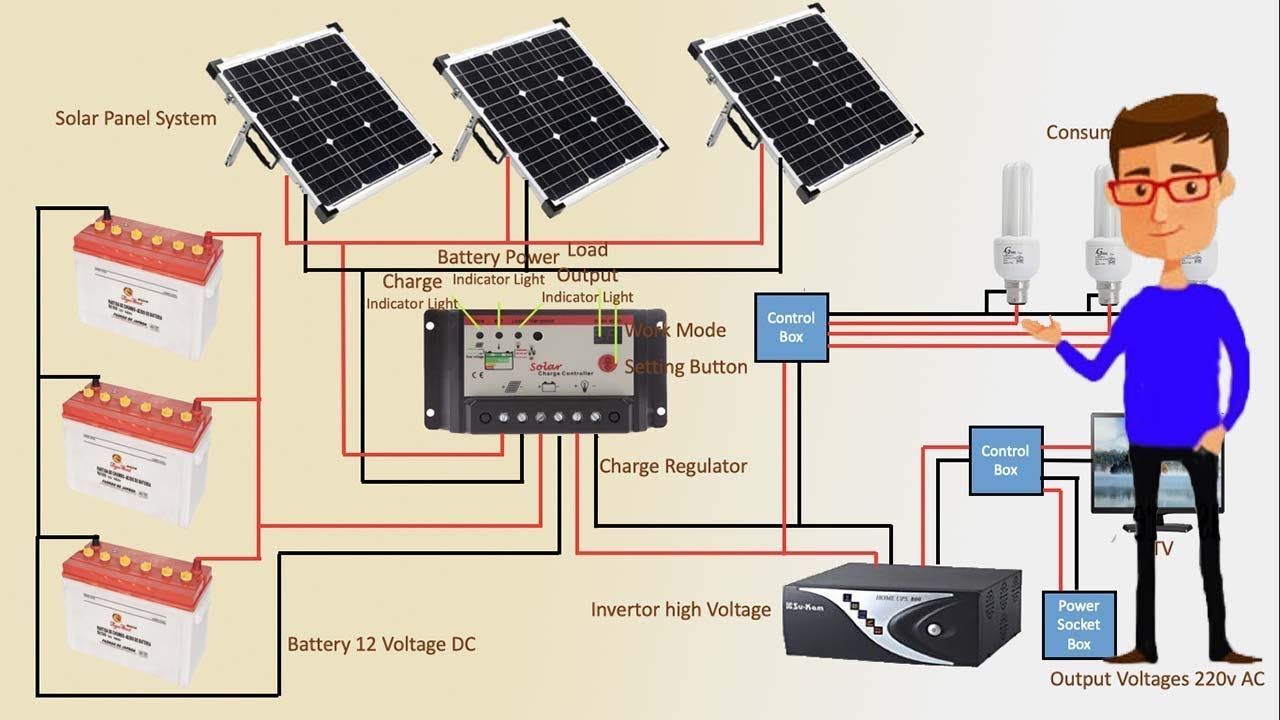
Step 6: Connect the Wiring
After the solar panels are installed, the next step is to connect the wiring. This will involve connecting the panels to an inverter, which will convert the sunlight into usable electricity. It’s important to hire a licensed electrician to perform this step to ensure it is done safely and correctly.
Step 7: Test the System
Once the solar panels are installed and the wiring is connected, it’s time to test the system. This will involve checking the voltage and current output of the system to ensure it is working properly. If everything is functioning correctly, you can start enjoying the benefits of solar power in your home.
Conclusion
Installing solar panels at home can be a great way to save money on your energy bills and reduce your carbon footprint. By following this step-by-step guide, you can confidently install solar panels on your home and start enjoying the benefits of clean and renewable energy.